When you are considering starting your own vlog, one of the options that you have is to create your own YouTube channel. With this in mind, you will bee to have a YouTube banner to display on your YouTube channel page.
Looking for a good vlogging camera with flip screen?

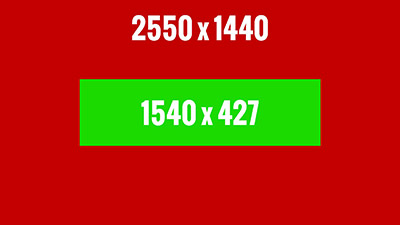
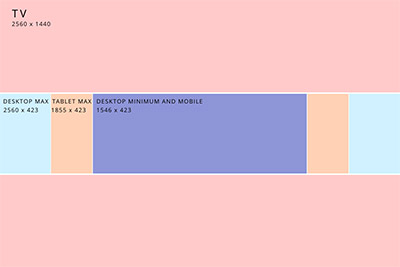
One of the questions that many people have is regarding the Youtube banner size. Well, the Youtube banner size us 2560 x 1440 pixels. However, as a rule of thumb, you need to ensure that you keep your important images and text within a safe space of 1546 x 423 pixels at the center of the image. One of the things that many people don’t know is that YouTube crops the banner image once you upload it and it is based on the size of the device where it is displayed.
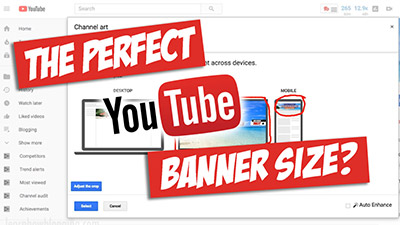
One of the things that you will be glad to know is that as soon as you upload your YouTube banner, the website will show you how your banner will look like in different devices. This way, in case your images and text are so legible or as crisp as you wanted them to be, you can easily redo your banner and upload a new version.
These are the most affordable vlogging cameras.
Creating Your Own YoTube Banner
Since you are just starting out your vlog, the last thing you want is to spend money on things that you can do on your own. While it can be affordable to have your YouTube banner designed by someone, you can do it by yourself if you want.

Problems with the audio? Check out these mics.
If this is the way you prefer to do things, then we need to advise you that you should create your Youtube banner size with 2560 x 1440 pixels. Then, before you start adding elements to it, you should define your “safe space”. As you still remember this should be 1546 x 423 pixels. As soon as you define it, you can add the elements that you want and configure them the best way you can.
Uploading Your YouTube Banner
When you have your YouTube banner completed, it is time to add it to your YouTube channel page.
In order to do this, you just need to follow some simple steps:
- Log in to your YouTube channel account.
- Click on the camera icon that is located in the upper right corner of the banner. In case you don’t see this option, you will need to click on the “Customize Channel” button, and then click on the “Add Channel Art” button.
- Upload the YouTube banner you created and preview it. Make sure to see how it displays in the different devices. In case you’re not happy, it is better to adjust t now than after.
Discover the best vlogging cameras for low light.
Add Your Banner To Your New YouTube Channel

And now comes the easy part. Since you already uploaded your banner and you’re happy the way it displays across the different devices, you just need to click on the “Customize Channel” button, and then on the “Add Chanel Art” button. In case you already have a YouTube channel and you are just replacing your banner, then you simply need to click on the Camera icon on the upper side part of your screen to upload the new image.
Add Social Media Profiles And Links To Your YouTube Banner
One of the things that you should definitely consider doing is adding links to your social media profiles and to websites within your YouTube banner.
Notice that you can only have 5 links to display and these will be located at the bottom right corner of your channel banner.
Click here to see everything you can do with your YouTube channel banner.
In order to add those links you just need to:
- Click on the “Customize Channel” button right below your banner.
- Click on the “About” section on the right side.
- Now it is time to add your 5 links. As a norm, YouTube adds an icon and the text on the first link that you add and it will then display icons for the rest of the pages.